


Did you know that up to 80% of luxury vinyl flooring failures along the coast are caused by improper subfloor prep—not the product itself? In Myrtle Beach, where humidity and salty air add unique challenges, preparing your subfloor right isn’t just recommended—it’s your key to stunning, durable floors. Whether you’re transforming a beloved vacation home or remodeling your main residence, mastering subfloor prep will save you time, money, and future repairs. In this expert guide, you’ll discover proven strategies for concrete and wood subfloors, practical tips tailored to Myrtle Beach’s climate, and advice you won’t find on a standard instruction sheet. Ready to protect your flooring investment? Let’s get started!
Discovering the Facts: Why Subfloor Preparation Matters for Vinyl Installation in Myrtle Beach
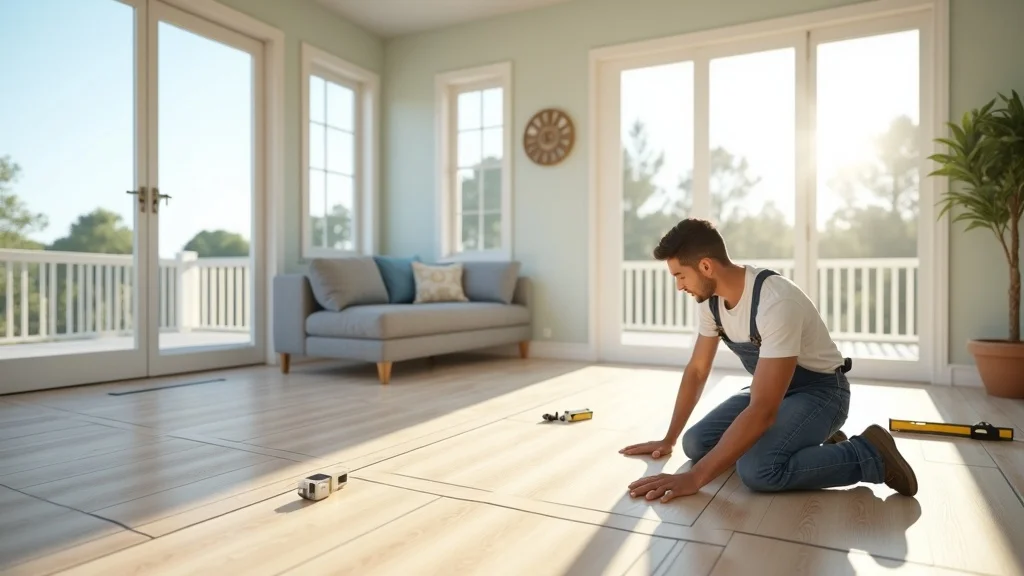
Imagine walking across your beautiful vinyl plank flooring only to hear a telltale creak or feel a surprising soft spot beneath your feet. In Myrtle Beach, where moisture and humidity are constant threats, skipping subfloor preparation can lead to these issues and more—think warped boards, mold growth, and costly repairs that spike stress and sink your budget. Preparing your subfloor before vinyl flooring installation ensures a flat, smooth foundation and helps your flooring resist Myrtle Beach’s salty air and seasonal dampness.
The main secret behind long-lasting luxury vinyl and floating vinyl floors is a subfloor that’s meticulously cleaned, leveled, and protected from moisture. Any high spots or low spots left unchecked during prep can result in visible lumps, bouncy planks, or even premature wear, especially in high-traffic areas like living rooms or busy commercial spaces. By following proven preparation steps, you’ll prevent these pitfalls, saving both time and money over the life of your floor. With Myrtle Beach’s unique climate, getting this step right is more crucial than ever.
What You'll Learn About How to Prepare Subfloor for Vinyl Installation in Myrtle Beach
- The importance of subfloor readiness in vinyl flooring installation and long-term durability
- Step-by-step guide for preparing concrete and wood subfloors
- Common mistakes to avoid with vinyl plank flooring and plank flooring
- Expert tips for floating vinyl and vinyl plank installations in coastal climates
- Product recommendations for subfloor materials in Myrtle Beach
Understanding Subfloor Essentials for Vinyl Flooring Installation
Before you dive into how to prepare subfloor for vinyl installation in Myrtle Beach, it’s crucial to know what kind of subfloor you’re working with. Each type requires slightly different preparation, and knowing your starting point determines how successfully your floors withstand the region’s unique coastal challenges. Not every existing floor is a perfect candidate for direct vinyl installation—recognizing this early avoids future headaches and maximizes your investment in premium vinyl or luxury vinyl plank flooring.
Subfloors come in different forms, most commonly plywood and concrete subfloor, but you may also have tile flooring or existing plank flooring underneath. Each has its quirks—concrete can trap moisture, while wood is prone to sagging and rot. Even if your subfloor was fine for carpet, it may not meet the demanding standards for luxury vinyl or floating vinyl floors. The right prep levels the playing field (literally and figuratively) for a perfect finish and guaranteed longevity.
Types of Subfloors Ideal for Vinyl Plank and Luxury Vinyl
- Plywood: Stable and commonly found in modern homes, suitable for both glued-down and floating installations if properly cleaned and repaired.
- Concrete subfloor: Popular in first-floor and older homes, must be dry, level, and sealed against Myrtle Beach humidity to ensure vinyl floor success.
- Existing tile or plank flooring (with conditions): Can serve as a solid base if flat, firmly attached, and free from large grout lines, high spots, or low spots. Special care is needed to smooth imperfections with patch compound or underlayment before you start any vinyl plan installation.
Assessing Your Existing Floor Before Vinyl Flooring Installation
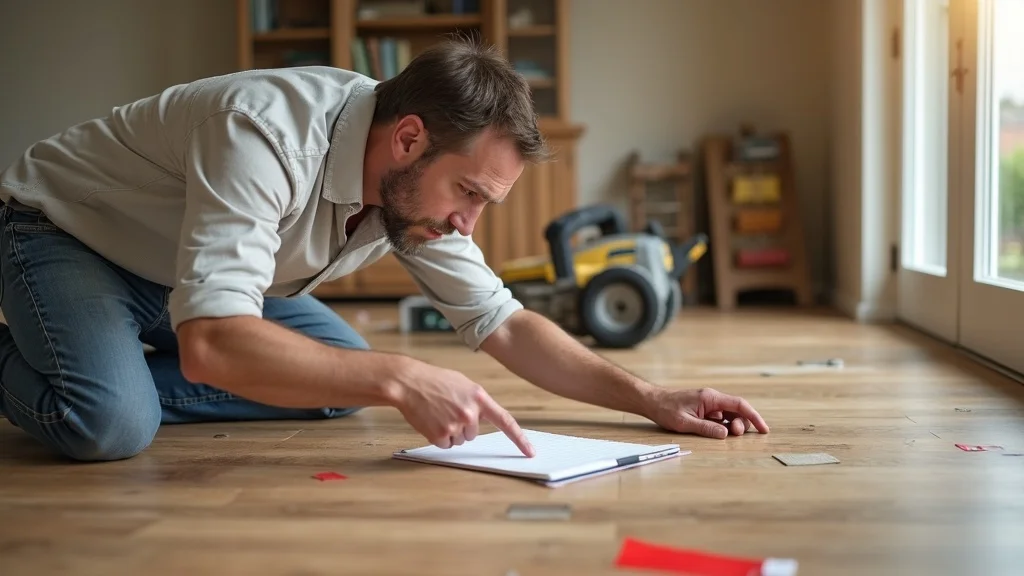
Don’t just cover up old floors and hope for the best—assessing your existing floor is vital no matter if you’re in a Myrtle Beach condo or single-family home. Start by clearing the area and giving your floor a close visual inspection. Scan for high spot bumps, low spot dips, loose nails, moisture stains, or previous water damage. Small problems here often become big issues once foot traffic and humidity join the mix, especially under plank flooring or vinyl plank flooring. Use a straightedge to check for flatness (no more than 3/16” deviation per 10 feet is the standard), and always test for moisture content—even if your floor “looks” dry, Myrtle Beach’s weather can play tricks.
For existing flooring like old vinyl or tile that’s still attached but uneven, a layer of patching compound to fill low spots or a leveling compound will create a uniform foundation. Remove debris, adhesives, and tacks, and ensure the surface is solid; any flex or bounce should be fixed before progressing. Assessing thoroughly now will save you both time and money, prevent future buckling, and make your vinyl flooring installation truly shine.
Preparing Concrete Subfloor for Vinyl Flooring Installation
Preparing a concrete subfloor for vinyl flooring installation is a process that requires precision and an eye for detail. Myrtle Beach’s coastal humidity can turn untreated concrete into a moisture trap beneath your gorgeous vinyl floor or luxury vinyl plank. Thorough prep means better resistance to warping and flooring issues—even in the most humid months. Here’s how to ensure your concrete subfloor is ready for a flawless finish:
The process begins with a meticulous cleaning to remove dust, debris, and any leftover adhesives from previous flooring. Every bit matters: even a small remnant can cause unevenness under vinyl plank or cause planks to lift under heavy foot traffic. Next, test the moisture content using a reliable moisture meter. High readings signal potential trouble and may require mitigation steps like a vapor barrier or special primers designed for damp conditions—a key for Myrtle Beach’s salty, damp air. Don’t forget to smooth out any high spots using a grinder or fill low spots with a leveling compound for a glass-flat finish.
Essential Steps for Concrete Subfloor Readiness
- Cleaning and leveling the surface to remove contaminants and fill imperfections for perfect vinyl floor install
- Moisture testing for Myrtle Beach’s humidity (never skip this step before vinyl plank installation)
- Using recommended primers and sealers to lock out excess moisture and extend the life of your luxury vinyl flooring
Use a straightedge to ensure evenness across the floor and a moisture meter to check that levels fall within manufacturer recommendations (usually below 75% relative humidity). When moisture is high, applying a specialty sealer is a must. This step can double the life of your new luxury vinyl plank in areas frequently exposed to humidity changes.
Expert Quote on Concrete Subfloor Preparation
"A properly sealed and tested concrete subfloor can double the life expectancy of your luxury vinyl flooring in high-moisture areas like Myrtle Beach." – Local Flooring Contractor
Preparing Wood Subfloor for Vinyl Plank Flooring in Myrtle Beach
Wood subfloors require a different prep approach, especially in regions with wide humidity swings like Myrtle Beach. Common wood issues—such as rot, sagging, or loosened floorboards—can create big headaches for your vinyl plank flooring installation. If your subfloor creaks or feels uneven underfoot, addressing these issues before laying down vinyl plank or tile flooring isn’t optional—it’s essential for a pro-grade result and long-term flooring stability.
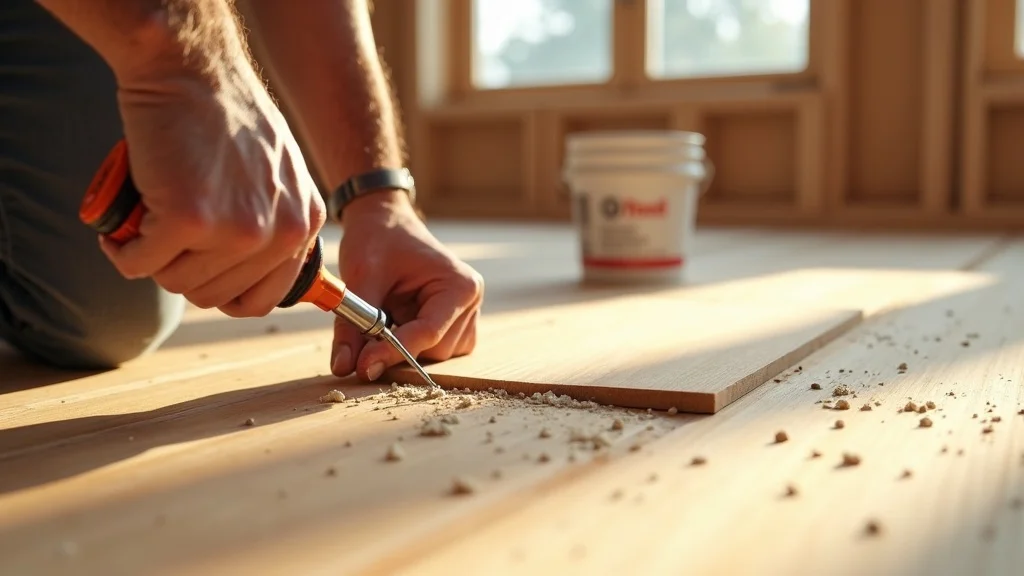
Begin by thoroughly checking for any signs of moisture intrusion, rot, or insect damage. Probe soft spots and replace rotted sections. High spots can be shaved down with a belt sander, while low spots are best filled with a patch compound to fill and even out the surface. Tighten any loose boards with screws and ensure the flatness with a straightedge. Myrtle Beach’s variable weather makes this thorough approach especially important—wood can expand, contract, or even squeak with changing temperatures and humidity, risking your luxury vinyl investment.
Inspection and Repair Methods for Wood Subfloors
- Checking for moisture and rot—remove and replace any damaged wood before starting your vinyl plan install
- Ensuring flatness (< 3/16” deviation per 10 ft)—sand high spots and fill any low spots for a level base
- Securing loose boards and replacing damaged sections to prevent future movement under plank flooring or floating vinyl
Recommended Treatment Products for Subfloor Longevity
For wood subfloors, invest in moisture-resistant primers, patching compounds for low spots, and a high-quality underlayment for floating vinyl plank installation. Brands formulated for coastal regions are best for Myrtle Beach conditions. These products lock out humidity, reinforce stability, and smooth out minor imperfections, giving your new vinyl planks a strong, lasting base.
When finishing repairs, double-check the moisture content of the wood before you begin your vinyl or plank flooring install. Products like antimicrobial underlayments, fortified wood patch compounds, and premium adhesives are smart picks to safeguard against the city’s frequent humidity spikes and salt-laden breezes. Don’t forget: investing in the right products now means you’ll enjoy quiet, stable floors for years, whether in homes or busy commercial spaces.
Steps to Level and Clean the Subfloor Before Vinyl Flooring Installation
One of the biggest differences between successful vinyl plank flooring installs and those that go wrong is the time spent cleaning and leveling. Dust, debris, or simply a tiny high spot or low spot can ultimately derail your project—making foot traffic noisy, floors wobbly, or seams visible. Don’t let this be you. Here’s the fail-safe, Myrtle Beach-approved method for perfect subfloor prep.
Start by vacuuming every inch of your subfloor; even small granules can compromise the fit or longevity of your luxury vinyl or floating vinyl installation. Use a self-leveling compound to fill deeper low spots and a patch filler for smaller imperfections, ensuring the finished base is smooth. For high spots, sand gently until level. A straightedge, level, and moisture meter are your best friends for this process—your vinyl flooring installation will thank you!
Leveling Tools and Techniques for Vinyl Plan and Vinyl Plank Installation
- Self-leveling compounds for smoothing out larger low spots or depressions
- Patch fillers for minor imperfections and transition dips between plank flooring areas
- Straightedge and moisture meter usage to ensure no areas are above manufacturer tolerance and that the subfloor is clean and dry for vinyl flooring
Consistent use of these tools guarantees a surface that’s not only level but also sound—ready for years of high traffic and Myrtle Beach’s unpredictable weather.
Proper Cleaning Procedures for Plank Flooring Install
- Vacuum thoroughly to remove dust and debris before vinyl plank installation
- Wipe with a damp mop—avoid excess water, especially on wood subfloors
- Allow subfloor to dry completely before proceeding; a damp subfloor is the enemy of luxury vinyl plank success
This method ensures no grit remains to telegraph through thin floors or interfere with adhesives. Drying thoroughly prevents trapped moisture that could eventually rise up and damage your new floors, even in Myrtle Beach’s tough coastal conditions.

| Subfloor Type | Preparation Steps | Common Issues | Products/Tools |
|---|---|---|---|
| Concrete | Clean, level, moisture test, seal | Moisture, cracks | Moisture meter, sealer |
| Wood | Inspect, repair, level, secure | Sagging, rot | Patch compound, underlayment |
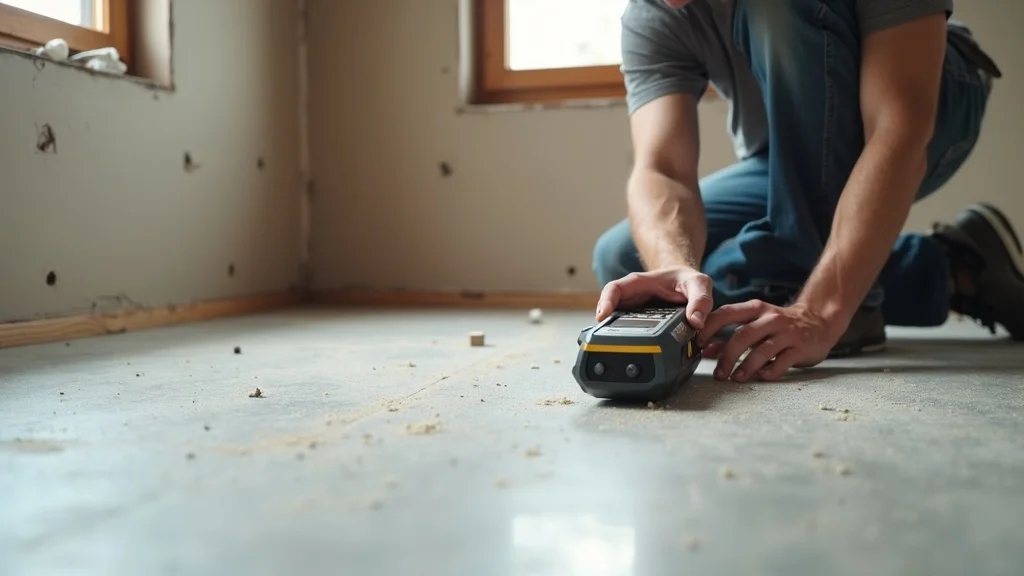
Best Practices: Moisture Testing and Mitigation for Vinyl Floor Success
Myrtle Beach’s climate means humidity and moisture are always part of the equation—making moisture testing a non-negotiable for vinyl floor prep. Even if your concrete subfloor seems dry, a hidden moisture problem can rapidly ruin your luxury vinyl or plank flooring. Always use a high-quality moisture meter and verify levels are within the manufacturer’s specified range before moving forward. For problematic areas, install a moisture barrier or sealer, and choose underlayment specifically rated for vinyl flooring and coastal environments.
Mitigating excess moisture not only prevents warping but also reduces the risk of mold and mildew—critical for homes in flood-prone or damp zones of Myrtle Beach. This attention to detail is what sets apart a professional vinyl flooring installation from a DIY job that might seem fine today but fails tomorrow. Investing in these precautions ensures you’ll enjoy your floors through every season.
Step-by-step walkthrough for subfloor moisture testing before luxury vinyl installation.Floating Vinyl Plank Flooring: Subfloor Considerations and Installation Tips
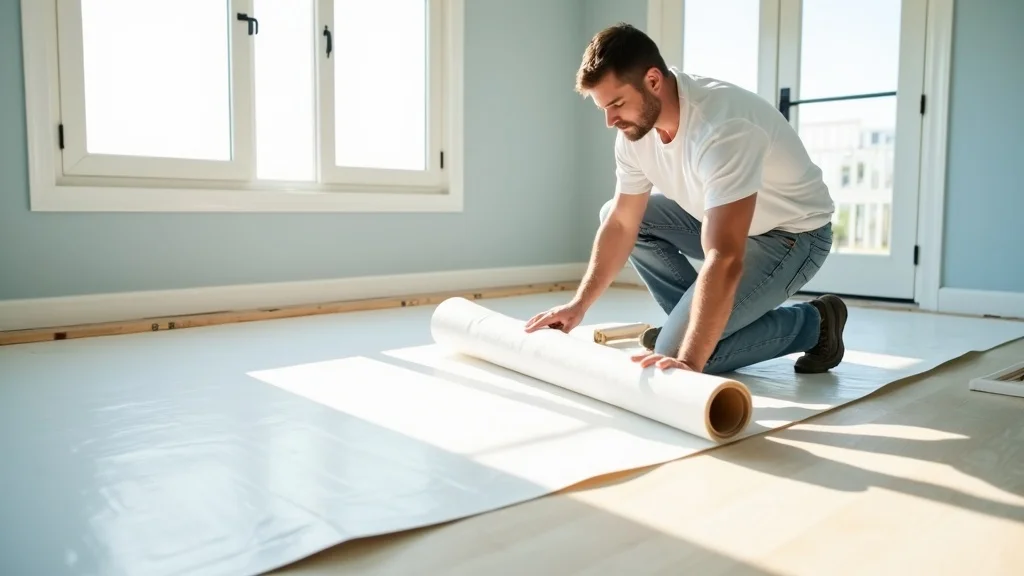
Floating vinyl plank flooring is increasingly popular due to its ease-of-installation and resilience. For Myrtle Beach residents, however, successful installation hinges on thorough subfloor prep and underlayment choices. This floating installation method means your floors will be subject to small shifts as humidity and temperature rise and fall. An expansion gap must be maintained around room edges, and any irregularities in your subfloor can quickly transfer up to the visible floor surface.
If you’re installing floating vinyl plank or luxury vinyl plank flooring, underlayment is your silent hero. Select one that acts as a moisture barrier, smooths minor subfloor imperfections, and provides sound absorption—especially important for second-story installations or commercial spaces. Remember, a flat, clean, and dry subfloor will let your floating installation resist buckling and creaking for years.
When to Use Underlayment with Vinyl Plank and Floating Vinyl
- Sound absorption, reducing noise in high-traction areas and living rooms
- Moisture barrier, essential for Myrtle Beach’s humidity and concrete subfloor
- Smoothing minor subfloor imperfections for a flawless look and wear
Common Vinyl Installation Mistakes to Avoid
- Skipping moisture testing before installation—leads to swelling, mold, and warped vinyl floor planks
- Neglecting subfloor cleaning and repair, causing bumps and uneven finish
- Using wrong underlayment or adhesives—resulting in product failure and voided flooring installation warranties
- Installing luxury vinyl on uneven flooring—visible high spots and low spots mean a shorter lifespan
Being aware of these mistakes is your best insurance for a flawless Myrtle Beach vinyl installation. Follow the prep steps outlined here and refer to your product’s installation instructions for the best results.
People Also Ask: Subfloor Prep for Vinyl Installation in Myrtle Beach
How do I prepare the subfloor for vinyl?
Start by removing all furniture and existing floor coverings. Thoroughly clean and vacuum the surface to eliminate debris. Next, check for and repair high spots or low spots using a leveling compound or patch filler, ensuring a flat, solid base. For concrete subfloors, test for moisture and apply a sealer if necessary before installation. For wooden subfloors, address any loose boards or damaged sections. Finally, confirm your subfloor is dry and dust-free before placing your vinyl flooring or plank flooring. Following these steps sets your flooring up for long-term durability in Myrtle Beach's climate.
Can you put vinyl flooring directly on a subfloor?
Yes, you can install vinyl flooring directly on a subfloor if it’s clean, dry, and properly leveled. However, subfloor prep is essential—any low spots, high spot, loose sections, or excessive moisture can compromise the installation. In humid Myrtle Beach, it’s wise to use a moisture barrier and underlayment, especially with concrete subfloor or wood. Skipping preparation can result in visible floor flaws, movement, and reduced life expectancy of your new vinyl plank flooring.
What to use for subfloor under vinyl?
The best products to use under vinyl depend on your subfloor material. For concrete, a high-quality moisture sealer or vapor barrier underlayment is strongly recommended. For wood, secure patch compounds for filling imperfections, antimicrobial primers, and a smoothing underlayment are best. Choose an underlayment specifically rated for vinyl or plank flooring—these provide both moisture defense and sound absorption, key to successful vinyl plan and floating vinyl installations in Myrtle Beach homes.
What are common vinyl installation mistakes?
Common mistakes include skipping moisture tests, failing to level the subfloor, using the wrong underlayment, and not leaving an expansion gap for a floating installation. Others overlook repairs to damaged wood or do not fully clean the surface, allowing dust or debris to interfere with adhesion or cause bumps under luxury vinyl. Avoiding these errors with detailed preparation leads to longer-lasting, better-looking floors—especially important for Myrtle Beach’s demanding conditions.
Frequently Asked Questions about How to Prepare Subfloor for Vinyl Installation in Myrtle Beach
-
How long should I let the subfloor dry before installing vinyl?
Make sure your subfloor is completely dry—at least 24-48 hours after cleaning or leveling. Use a moisture meter on concrete; only proceed when readings are within manufacturer specs. -
Can I install vinyl flooring over radiant heat systems?
Yes, but you must use a radiant heat-compatible vinyl floor and follow specific manufacturer recommendations, including temperature limits and underlayment type. -
What is the best way to remove old adhesive from subfloors?
Use a scraper and adhesive remover suitable for your subfloor type. For tough spots, sanding or applying a compound to fill and cover residual adhesive works well. -
How do I ensure my new vinyl plank flooring lasts in Myrtle Beach?
Always address moisture, level and clean the subfloor, use top-quality underlayment and sealers, and follow installation instructions to the letter for enduring results.
Key Takeaways: How to Prepare Subfloor for Vinyl Installation in Myrtle Beach
- Proper subfloor prep is crucial for successful vinyl flooring installation in Myrtle Beach's unique climate
- Always conduct a moisture test on concrete and wood subfloors before starting
- Use quality underlayment and sealers to prevent future moisture issues
- Follow a step-by-step approach for leveling and cleaning subfloors for seamless installation
Conclusion: Setting the Foundation for Lasting Vinyl Floors in Myrtle Beach
Proper subfloor preparation is your best investment for flawless vinyl floors in Myrtle Beach—take your time and do it right for results that last.
Ready to Upgrade?
If you want vinyl plank flooring or luxury vinyl installed by Myrtle Beach experts, Call today for a free quote (843) 457-6114 or visit our website for more information.
Ensuring your subfloor is properly prepared is crucial for a successful vinyl flooring installation, especially in Myrtle Beach’s unique climate. For comprehensive guidance, consider the article “How to Prep Your Subfloor Before Vinyl Installation,” which offers detailed steps on cleaning, leveling, and moisture testing to achieve a flawless finish. Additionally, the “How to Install Vinyl Plank Flooring” guide from The Home Depot provides practical tips and tools required for the installation process. If you’re serious about achieving durable and aesthetically pleasing vinyl flooring in Myrtle Beach, these resources will equip you with the necessary knowledge and techniques.


Write A Comment